Thursday, 9 April 2015

Top 20 most beautiful world living spaces

If you surf the Internet ideas for interior decoration and renovation tips, you are at right place. In today's article we are reaping the 20 most beautiful living spaces in the world. I'm sure you hate your apartment after the departure of the images below. Switzerland, across America and even Australia, there is a better project within that we have collected and united in the gallery below. We hope you enjoy:

The Heinz Julen Penthouse in Zermatt, Switzerland

beautiful-living-space-1

The Clock Tower Apartment in Brooklyn, NY

beautiful-living-space-3

The Yellowstone Club in Big Sky, Montana

beautiful-living-space-4

The Firefly in Zermatt, Switzerland

beautiful-living-space-5

St. Lucia with resort


beautiful-living-space-6

Chalet Brickell in Rhone-Alpes, France

beautiful-living-space-7

Converted cathedral

beautiful-living-space-8

The Over Water Bungalow at Le Meridien in Bora Bora


beautiful-living-space-9

The Igloo Village in Kakslauttanen, Finland

beautiful-living-space-10

The Ladera Resort in St. Lucia Resort

beautiful-living-space-11

The Underwater bedroom in the Maldives

beautiful-living-space-12

The Garden House in Brazil


beautiful-living-space-13

The Pretty Beach House on the Bouddi Peninsula in Australia

beautiful-living-space-14

Jade Mountain in St. Lucia

beautiful-living-space-15

The Southern Ocean Lodge on Kangaroo Island in Australia

beautiful-living-space-16

The Tree House in Costa Rica

beautiful-living-space-17

The Redwood grove cabin in California

beautiful-living-space-18

The Royal Loft Suite aboard the Oasis of the Seas

beautiful-living-space-19

The Chalet Zermatt Peak in Switzerland

beautiful-living-space-20

The One Room Glass Iglo House

beautiful-living-space-2

Wednesday, 1 April 2015

The process of changing a tap washer

Put the plug into the plug-hole of the sink to prevent losing the washer or any tap components when dismantling it.  Unscrew the top plate of the tap. If you can't do this by hand, use a wrench and protect the tap with a cloth first.

Some taps have a body cover, which you will need to remove before you can unscrew the top section (or stem) of the tap to access the washer underneath. Secure the tap with another wrench while you remove this section.

The washer is underneath this and it will either be pressed into place or held in position with a nut. Use a screwdriver to release it then clean the stem before fitting the new washer.

Reassemble the tap, take the plug out of the sink and turn on the water supply to test the tap.

If your tap continues to drip its valve seating might be eroded. Repair this using a washing and seating set, which you can buy from a plumbers merchant.

Need some DIY help? Hire a tradesman today with our handy tool! 

post from sitemap

Best-ever stain-busting tips

Red wine on your carpet? Grease on your tablecloth? Don't panic! Save your soft furnishings from these common spillages...

1. RED WINE - Blot with a paper towel, dab with water and blot again. Spray with a specialist product such as Oops! Red Wine Stain Remover, £6.95 
for 100ml, from The Handpicked Collection.

2. BEER - Blot with paper towels then sponge with a solution of 1tsp laundry detergent in a cup of warm water. Next, use a solution of one part white vinegar with two parts cool water. Sponge with water again and then blot dry.

3. GREASE - Sprinkle with cornflour. Leave for 10 minutes, then remove the flour, sponge the area with water and blot dry.

4. CHOCOLATE - Place paper towels on top and run a cool iron over it. Get rid of the remaining mark by sponging with 1tsp laundry detergent in a cup of warm water, then rinse with water and blot dry.

5. COFFEE - Soak with lemon juice or white vinegar, then blot. Sponge with water and blot dry. 

Looking for more cleaning tips? Check out our Stain removal tips - the A-Z guide and our dedicated cleaning channel for more cleaning advice and solutions.

post from sitemap

Step-by-step guide

Step 1) Fully open any thermostatic radiator valves, including heated towel rails, and run your central heating for ten minutes. Then turn off the system.

Step 2) Put the bleed key into the valve and slowly turn anti-clockwise. Take care when turning the valve. Have your cloth ready to shield your hand and a small bowl to catch any small drops of water.

Step 3) If there is trapped air you should hear a hissing sound as it escapes. As soon as water begins to drip out, close the valve.

Step 4) Check the rest of your radiators. Often trapped air will only occur in one or two.

Step 5) Turn the heating on and check there are no drips.

* TOP TIPS *

* Bleed radiators at least once a year to release any trapped air in the system.

* If your radiators are cooler in one area of the house, the radiators aren't properly balanced. The nearest radiators to the boiler are taking more than their share of the hot water from the system. Call in a local tradesman to fix it.

Want to cut down on energy bills? Check out our essential guide to heating.

Need some DIY help? Hire a tradesman today with our handy tool!

post from sitemap

How to change a tap washer

Replacing a tap washer is a quick DIY job, but you will need some tools before you begin. 

Make sure you have two adjustable pipe wrenches, a slot head screwdriver, some cloths and a pack of washers.

To start, turn off the mains water supply by turning the main stopcock off - a valve normally located under your kitchen sink - until your tap runs dry.

If you are changing the washer on hot taps, you must also turn the immersion heater and boiler off.

Note that monobloc taps do not have washers. Instead, they have ceramic discs, which are very hard wearing. To replace a ceramic disc you would need to get a replacement cartridge from your tap manufacturer. 

To change a washer, follow our simple guide.

post from sitemap

Stain removal tips - the A-Z guide

Need cleaning tips? Battling with a red wine stain that just won't go away? Fear not, our essential guide has everything you need to know - from cleaning products to expert spring cleaning advice.

Plus, if you're planning a good old spring clean, check out our essential guide to spring cleaning and our grottiest ever cleaning jobs - solved!

For now read on, for everything from getting rid of ballpoint pen marks to shoe polish stains...

post from sitemap

How to clean a washing machine

If your washing machine is looking a bit worse for wear, bring it back to life with our top 5 cleaning tips:

1. Clean the detergent drawer

The detergent drawer is a haven for germs, encrusted washing powder and mould. If possible, remove the entire drawer and set to work with an old toothbrush. An ordinary domestic cleaner is fine.

2. Unblock the filter 

The filter is another place where germs collect as it's warm and humid. Empty it regularly and remove fluff and dirt that has gathered inside.

3. Clean the drum

Even if the inside of your washing machine looks sparkling clean, it's probably not. There are lots of cracks and holes where germs can fester. The best thing to do is run an empty wash every couple of months.

Use soda crystals or even dishwasher tablets and run on a hot wash (preferably 60 degrees). This should kill germs, remove odours and stop soap scum and limescale building up.

4. Prevent bad smells

Leave the washing machine door open slightly after washes to allow air to circulate around the drum - this will help stop germs breeding.

5. Use the right detergent

Use powder rather than liquid. Extra suds and liquid softeners have been linked to residue in the machine that may contribute to bad smells and mould.

Need a new washing machine? Follow our guide to buying a new washing machine.

post from sitemap

Bathroom designs - from country to modern

Need inspirational bathroom ideas? From country bathrooms to modern suites, our essential guide is packed full of ideas to kick-start your project.

Country bathrooms

Transform your ensuite with vintage-style details, floral wallpaper and white-painted floorboards.

Traditional bathrooms

From elegant roll-top baths to sophisticated window treatments, be inspired by traditional decorating schemes.

Modern bathrooms

Get clever with spotlights, sparkling tiles and the latest bathroom fittings.

Browse 345 bathroom schemes

Choose your favourites and add them to your shortlist.

SEE VIDEO Glamorous bathroom design ideas

Laurence Llewelyn-Bowen reveals his 4 essential steps to a luxurious bathrom.

SEE VIDEO Bathroom storage - why less is more

Laurence Llewelyn-Bowen's cruel-to-be-kind bathroom storage tips.

Bathroom flooring - the essential guide

Step safely out of the bath with our essential guide to stylish and practical bathroom flooring.

Our favourite bathrooms

See which schemes have caught our blogger's eye this week...

post from sitemap

Post-party clean-up guide

Cleaning up after a party doesn't have to be a headache - although you might have one! Get your house shipshape in no time with our step-by-step guide to tackling the morning-after mess...

STORE food leftovers you want to keep - wrap in clingfilm and put in the fridge as soon as possible.

OPEN THE WINDOWS - even if it's cold outside - to banish stale odours.

WEAR AN APRON over your pyjamas and don some rubber gloves.

PREVENT MORE SPILLAGES by getting rid of bottles and glasses first.

COLLECT BOTTLES in a recycling bag or bin, emptying dregs into a bucket as you go to save constant trips to the sink.

GATHER GLASSES by placing them on a tray lined with a damp cloth (for grip). Again, empty dregs into a bucket as you go. If you have a dishwasher, fill it with glasses and set it going. Otherwise, wash them by hand and leave to drip-dry upside down on clean tea towels placed on the worktop.

LAYER TWO BIN BAGS, one inside the other, to stop any leakage through tears.

PICK UP all the non-recyclable waste from around the house, including any unwanted food that can't be composted, then put it in your outside bin.

SOAK PLATES AND CUTLERY to soften dried-on food and stop odours until you're ready to wash them.

TACKLE STAINS from wine or food on your carpets and upholstery. Follow our tips (right) if you want to use more eco-friendly methods or, alternatively, use an all-purpose carpet and upholstery stain remover such 
as Sainsbury's Carpet & Upholstery Cleaner, £2.55 for 500ml, which is a winner of a Which? Best Buy Award.

TREAT TABLECLOTHS and linen napkins with a pre-wash product such as Stain Zappa, £3.29 for 100ml, Lakeland, then put them in the washing machine.

VACUUM the whole house thoroughly.

PUT AWAY GLASSES and load the plates and cutlery into the dishwasher.

WIPE SURFACES with a multisurface cleaner, then mop any hard floors to remove sticky residues. Start with the outer rooms first and work your way towards the kitchen.

RELAX with a cup of tea and put your feet up - you've earned it! Happy new year!

Click ahead for the best-ever stain-busting tips... 

post from sitemap

How to clean mirrors

Keeping mirrors sparklingly clean seems like a hassle, but it's not that difficult to keep those surfaces shining.

Follow our guide and you'll be gazing at your mirror, rather than your reflection, for hours...

What you need to clean a mirror

Ever since Kim and Aggie started cleaning up people's houses, we've discovered the joy of the store cupboard essential - vinegar - as a cheap and effective cleaning product.

But, when it comes to getting gleaming mirrors, the key is a microfibre cloth and warm water.

You might also want to keep some washing-up liquid, a sponge and some shaving foam (not gel) on hand. Read on to find out why...

Get mirrors sparkling

If your mirrors aren't too dirty, they can be sorted in seconds with a little warm water, applied and rubbed dry (in even circular motions to avoid smears) with a microfibre cloth.

If, however, there's a little more grime involved, dilute some washing-up liquid in a basin of warm water and use a sponge to wipe over the mirrored surface. Then, buff away any remaining marks with a clean microfibre cloth.

Keep steamed-up mirrors at bay

Follow this tip, and those steamed-up bathroom mirrors - useless when you emerge from the bath or shower - will be a thing of the past.

To keep mirrors steam-free, apply a little shaving foam evenly across the surface. Wipe away and buff with a microfibre cloth, and hey presto! Shimmering mirrored surfaces in seconds!

Looking for more great cleaning tips? Housetohome is on hand to help.

post from sitemap

How to clean carpets and carpet tiles

* Regular vacuuming is essential for carpets, as it prevents loose dirt and grit from working into the carpet pile where it will damage the fibres. Upright vacuum cleaners are best, especially those with revolving brushes to dislodge embedded dirt. Use the suction head for loop-pile carpets, as beater brushes and heads can cause the carpet to bobble.

* Manufacturers recommend an annual steam clean. Find a cleaning company by browsing our carpet directory, or ask your local dry cleaners - they can often hire out equipment.

* Clean according to wear. Whether you do it yourself or call in the professionals, high-traffic areas should be cleaned once every two years.

Natural remedy

Remove wine or grease stains from carpet by lightly sprinkling area with baking soda. Dab it up and add a little more if necessary. Leave on until the wine is absorbed, then vacuum up any residue left.

* For more advice on cleaning and stain removal, contact The National Carpet Cleaners Assocation.

Source : housetohome[dot]co[dot]uk
post from sitemap

How to sell your home quickly

Looking for a quick sale? We contacted the National Association of Estate Agents for top tips and expert advice on selling your home.


Source : housetohome[dot]co[dot]uk
post from sitemap

How to clean wooden flooring

* Sweep wooden floors regularly, or use a vacuum cleaner with a brush setting.

* Mop once a week or so with a well-wrung mop, using soapy cleaner specifically for use on wood. Don't saturate the floor or allow water to stand on it as this can cause damage. Try Method's new wood-floor care kit, £29.95, John Lewis.

* Wet-clean waxed boards sparingly and wax polish them to improve the patina. Dirty wax build-up should be removed with white spirit and the boards re-waxed. Treat engineered boards with oil or lacquer reviver, applied with a soft cloth.

Natural remedies

* Remove scuff marks from wooden floors by rubbing them gently with a pencil eraser.

* Bring out the natural colour of your wood flooring by wiping the surface with lemon oil and a dry cloth. However, this only applies to natural and waxed flooring, not varnished floors.

For more information, see our essential guide to wooden flooring. 

Source : housetohome[dot]co[dot]uk
post from sitemap

Gordon Ramsay's guide to cookware

Take your cookware cue from the professionals. Celebrity chef Gordon Ramsay gives housetohome his top tips on caring for cookware and keeping it looking as good as new.

Read on for Gordon's short, sweet and straight-to-the-point tips on keeping your cookware in top condition.

Source : housetohome[dot]co[dot]uk
post from sitemap

How to identify your damp problem

Rising damp is water that enters a structure from the ground, commonly caused by having a damaged damp proof course, or no damp proof course at all.

Symptoms include decayed skirting boards and floors, stained plaster and peeling paint and wallpaper.

Penetrating damp is when water enters a building from outside and moves through the walls, often creating stains or mould growth at some distance from the leak.

Caused are defects in guttering and pipes, faulty flashings, poor pointing and cracked rendering.

Condensation, the most common form of damp, is often caused by poor heating and ventilation. It occurs when activities such as cooking raise the level of humidity in a building. This air condenses on cold surfaces - windows ans walls.

Running water on windows is the most obvious signal of condensation and can lead to stained curtains, decaying window frames or moulding on paint and wallpaper.

Source : housetohome[dot]co[dot]uk
post from sitemap

How to clean laminate flooring

* Laminate should be swept or vacuumed regularly. Using a damp cloth is fine, but never soak the floor with water - they're designed to be water resistant.

* Most spills on laminate can be removed with household cleaners but, if the stain is lipstick, ink or permanent marker, try acetone.

* Never use scouring pads to remove stains on laminate flooring, and remove any liquid stains from the floor as soon as possible.

Source : housetohome[dot]co[dot]uk
post from sitemap

How to clean cutlery

Throwing a dinner party? Bring the sparkle back to your cutlery by soaking it in hot water.

Add a teaspoon of bicarbonate of soda to help remove stubborn stains. After ten minutes rinse and buff with a tea towel for a spectacular shine.

Want your wine glasses to shimmer on the dining table? Hold one above your kettle as it's boiling and let the steam fill the glass. Use a clean tea towel to polish.

Source : housetohome[dot]co[dot]uk
post from sitemap

Wipe Out! Make Your Own Cleaning Wipes

homemade cleaning wipes

Who doesn't love commercial cleaning wipes?

They're wickedly convenient--but also wickedly expensive and often contain harsh chemicals.

The alternative: make your own refillable cleaning wipes!

Homemade cleaning wipes are easy to make, economical, and contain only those cleaning agents you select. Use them in the kitchen, the bathroom, or for cleaning windows.

Put homemade cleaning wipes to work for you in your organized home with our easy instructions and cleaning recipes.

Homemade Cleaning Wipes

Materials and Equipment Needed:

  • cylindrical or tall square plastic food storage container, 10-cup capacity
  • extra-large roll of paper towels
  • cleaning agents of your choice (recipes follow)
  • electric drill with 1/2-inch drill bit
  • electric knife
  • liquid measuring cups

Instructions:

In the garage or workshop area, place a small block of wood beneath the plastic food storage container lid. Use electric drill to drill a 1/2-inch diameter hole in the center of the container lid.

For best results, select an extra-large roll of good quality paper towels for this project. Less-expensive towels fray or shred when pulled through the holder; thicker quilted towels have greater cleaning strength and withstand more scrubbing. Even at $1.39 per roll, cost for homemade wipes will be less than 75 cents, not including the storage container.

Without removing the paper towel wrapper, use the electric knife to cut the paper towel roll into two shorter rolls. Be patient! It may take up to two minutes to cut through the towel roll and cardboard tube inside.

Remove the wrapper, and place one short paper towel roll inside plastic food storage container. Save the second roll for a refill later.

Using a liquid measuring cup, gently pour one of the following cleaning solution recipes over the top of the paper towel roll.

Place the lid on the plastic food storage container, and allow paper towels to absorb cleaning solution for 4 hours to overnight.

Open the food storage container. Gently pull the wet cardboard tube from the center of the paper towel roll and discard.

Carefully pull the end of the paper towels from the inside, where the cardboard roll had been. Thread the end of the towels through the hole in the lid, and replace the lid.

Pull gently on the exposed end to separate the cleaning wipe.

Homemade Cleaning Wipes Recipes

You will need between 2 and 4 cups of cleaning solution to fill your homemade cleaning wipes container, depending on the size and absorbency of the paper towel product selected. These cleaning recipes make about three cups of solution; increase or decrease amounts if needed.

General Surface Cleaning Recipe:

  • 1 1/2 cups white vinegar
  • 1 1/2 cups water

Disinfectant Cleaning:

  • 1/4 to 1/2 cup pine cleaning solution such as Pine-Sol brand
  • 2 1/2 to 2 3/4 cup water

Window and Glass Cleaning:

  • 1/2 cup rubbing (isopropyl) alcohol
  • 2 1/2 cups water
  • 1 tablespoon white vinegar

Tips:

As you use the wipes, they will begin to dry out, so add more water and/or cleaning solution as necessary. Allow wipes to stand overnight before continuing to use them after adding more solution.

You may vary the strength of the cleaning solutions as necessary for your household, using more cleaning agents for a stronger wipe, less solution and more water for a milder product.

  • Source : organizedhome[dot]com
    post from sitemap

    Pantry Recipes for Homemade Cleaning Products

    recipes for homemade cleaners

    Taken a trip down the cleaning aisle at the supermarket lately?

    If you believe the ad hype, you can't keep a clean house without loading your shopping cart with a different cleaner for each surface, floor and sink in the house.

    Hogwash! Simple recipes using products from your pantry make effective household cleaning solutions.

    An added plus: these natural products are more environmentally friendly than commercial alternatives.

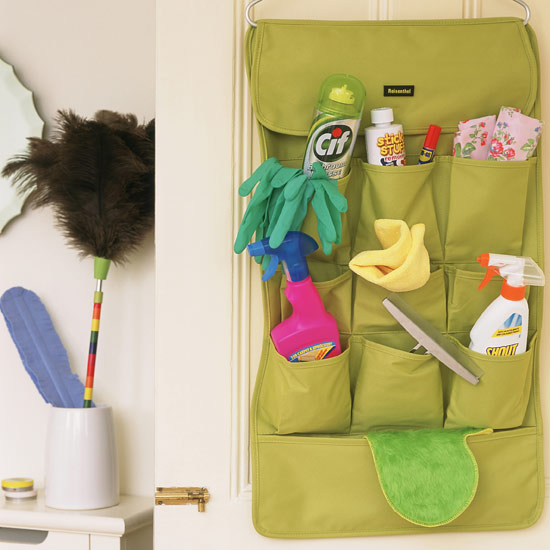
    Stock your cleaning tool tote with these homemade cleaning sprays and solutions to make short work of household grime--without harsh chemicals or irritating fumes.

    Try these easy recipes to clean your organized home faster, better and cheaper.

    White Vinegar

    Mildly acidic white vinegar dissolves dirt, soap scum, and hard water deposits from smooth surfaces, yet is gentle enough to use in solution to clean hardwood flooring.

    White vinegar is a natural deodorizer, absorbing odors instead of covering them up. (And no, your bathroom won't smell like a salad! Any vinegar aroma disappears when dry.) With no coloring agents, white vinegar won't stain grout on tiled surfaces. Because it cuts detergent residue, white vinegar makes a great fabric softener substitute for families with sensitive skin.

    Try these recipes to harness the cleaning power of white vinegar:

    Homemade Spray Cleaner Recipe

    Mix in a sprayer bottle:

    • 1 cup white vinegar
    • 1 cup water

    In the kitchen, use vinegar-and-water spray to clean countertops, lightly soiled range surfaces and backsplash areas.

    In the bathroom, use vinegar spray cleaner to clean countertops, floors, and exterior surfaces of the toilet.

    For really tough bathroom surfaces such as shower walls, pump up the cleaning power by removing the sprayer element and heating the solution in the microwave until barely hot.

    Spray shower walls with the warmed generously, allow to stand for 10 to 15 minutes, then scrub and rinse. The heat helps soften stubborn soap scum and loosens hard water deposits.

    Undiluted White Vinegar

    Undiluted white vinegar--straight from the jug--makes quick work of tougher cleaning problems involving hard water deposits or soap scum.

    Use undiluted white vinegar to scrub the inside of the toilet bowl. Before you begin, dump a bucket of water into the toilet to force water out of the bowl and allow access to the sides. Pour undiluted white vinegar around the bowl and scrub with a toilet brush to remove stains and odor. Use a pumice stone to remove any remaining hard water rings.

    Clean shower heads that have been clogged with mineral deposits with undiluted white vinegar. Place 1/4 to 1/2 cup vinegar in a plastic food storage bag, and secure the bag to the shower head with a rubber band. Let stand for 2 hours to overnight, then rinse and buff the fixture to a shiny finish.

    Add one cup of undiluted white vinegar to the laundry rinse cycle instead of commercial fabric softener. White vinegar softens clothes and cuts detergent residue--a plus for family members with sensitive skin.

    Baking Soda

    Baking soda's mild abrasive action and natural deodorizing properties make it a powerful replacement for harsh commercial scouring powders. Put baking soda to work in your organized home.

    Sprinkle baking soda onto a damp sponge to tackle grimy bathtub rings, scour vanities, or remove food deposits from the kitchen sink.

    For tougher grime, make a paste of baking soda and water, apply to the tub or sink, and allow to stand for 10 to 20 minutes.

    Dirt, soap scum and deposits soften and are easier to remove.

    Slow-running drains? Keep bathroom drains running freely by pouring 1/2 to 3/4 cup baking soda into the drain, and dribbling just enough hot water to wash the solution down.

    Let stand for 2 hours to overnight, then flush thoroughly with hot water. The deodorizing effect is an added bonus! [Do not use this method on blocked drains.]
  • Source : organizedhome[dot]com
    post from sitemap

    Kids and Chores: Chilling The Chore Wars

    kids chores

    When it comes to kids and housework, the blasted terrain is familiar: a dirty house, balky children, and frazzled, frustrated parents.

    Tired parents try it all, from chore charts to screaming fits.Canny children engage in housework sabotage, selective hearing or childish irresponsibility to duck assignments.

    The noise levels--and stress levels--rise along with the stacks of dishes.

    How to negotiate a peace on the issue of children and chores?

    Try these family-tested strategies to calm the conflict and gain the goal.

    The Buck(et) Stops Here

    We have met the enemy, and it is us! Lingering ambivalence about our family's life and our own choices can keep us from successfully gaining kid cooperation where household chores are concerned.

    Perhaps we grew up in a home heavy with sex-role stereotypes but have chosen a different viewpoint. Maybe we work, and feel a lingering guilt. Some of us may still harbor childish resentment against our own parents, and feel uneasy about "making" children do household chores.

    Whatever the reason, an ambivalent mindset can sabotage attempts to enlist children in the fight. Too often, we announce a new regime of household chores in a moment of anger and frustration. Elaborate chore charts are made and ignored after the third day. Family meetings are held which settle nothing more than another layer of dust on the television.

    This time, resolve to succeed. The place to start is with our own thinking. Housework is an inevitable part of life. Just as we prepare our children for their adult lives by sending them to school, so we need to prepare them to manage and maintain a home. Housework is an integral part of life for everyone, man, woman, and child. In today's busy families, there's no excuse for anybody to shirk their portion of the necessary work.

    A parent who knows this truth in his or her bones has a huge advantage. No more peaks-and-valleys cycles of "You will help with the chores!" followed by a relapse into "Ehhh, why bother? It's easier to do it myself!" Calm, determined parents who view household work as just another life skill are inoculated against childish manipulation and evasion. Motivated by parental love and responsibility, you'll go farther than fits-and-starts efforts fired by anger and frustration.

    Start Small

    The easiest way to secure your children's assistance with housework is to train them to it from the time they are small. A one-year-old will giggle if handed a clean diaper to dust the legs of the furniture.

    Preschoolers enjoy being with parents, working with parents. Nothing can be so much fun as washing a car with a five-year-old! (A pause for a tear-in-eye here, remembering my five-year-old younger son staggering from the garage with the car-wash bucket and supplies, and announcing, proudly, "Mommy, we're the Clean-Up Chappies!")

    Problem is, these little ones' efforts don't yet have the power to be of great help. In truth, you'll probably have to follow behind that one-year-old with his diaper duster, removing the specks of dirt he's rearranged.

    Even when you match the chore to the child, the early years require some extra work from you.

    Listen up, parents of tiny children: just do it! You have two tasks during these years.

    The short-term goal is to get the house clean; the more important duty is to teach your children to work. Focus on the first task to the exclusion of the second, and you're going to have "They think I'm the maid!" days, weeks, years in your future. An investment in your child's learning now will reap abundant fruit in just a few years. Neglect this job, and you're walking into a lion's den once little ones are little no longer.

  • Source : organizedhome[dot]com
    post from sitemap

    Swing into Spring: Five Easy Ways to Welcome Warm Weather

    spring cleaning

    Blooming bulbs and Spring breezes signal that warmer weather is on the way.

    Sure, many of us will do an all-out session of Spring cleaning, but even small, simple jobs can bring the season's freshness inside.

    Shake the winter doldrums out of your organized home with these five easy ideas to swing into Spring.

    Let the Light Shine: Wash the Windows!

    Sunny days look brighter through clean windows, so tackle the grime that winter storms have left behind on interior and exterior windows now. Whether you're an advocate of the diluted-vinegar-and newspapers approach, or prefer to wield a squeegee like the pros do, choose a bright, still day to clean exterior windows.

    Freed from their dark winter coats, clean windows spill sunshine inside, raising everyone's mood!

    Catch the Breeze: Open Windows on a Warm Day

    Cold weather brings shut windows and tightly-closed doors--which can create a build-up of stale odors in any home. When you live with them, your nose learns to ignore them, but nothing whispers "Spring is here!" like a freshly-aired house.

    Solution: let breezes blow! Air out the house one sunny afternoon to bring Spring's freshness inside. Opening doors and windows to catch a breeze will chase away old cooking smells and any stale or musty odors that have built up during the winter months.

    After an hour or so, close windows and doors, then tackle surfaces with an electrostatic cleaning cloth to capture any dust or pollen that's settled out in the breeze. Run the vacuum cleaner to remove dust from floors--and enjoy the Springtime freshness!

    Blooming Wonder: Bring the Season Inside

    Even if the budget won't stretch to regular purchases of cut flowers, Spring's blooming make it easy to spark up a home with fresh blossoms.

    Cut small branches from a flowering tree, or gather ready-to-bloom daffodils and tulips from the garden.

    Even an inexpensive bundle of cut flowers from the supermarket cooler can bring a welcome breath of Spring indoors.

    Displayed simply, in a tall water glass, vase or mason jar, they'll add a splash of Spring color and fragrance to your home.

    Fresh Start: Clean Out the Refrigerator

    The arrival of a new season is a good signal to clean out stored food in refrigerator and pantry. As farmers' markets and roadside stands open to offer fresh food for the new season, create a good home by cleaning out the remains of winter.

    Make a quick check of expiration dates of food stored in refrigerator or pantry, and toss expired foodstuffs.

    Look sharp for the last survivors of holiday gift baskets! If you haven't eaten the smoked salmon spread or served the Texas Hot Chili Mix by now, donate these treats to the food bank, so they're enjoyed by others.

    Give vegetable storage areas special attention. Bearded carrots, limp celery and shriveled onions can be tossed into a crockery slow-cooker overnight to make vegetable stock--or consign these items to the compost bin. Be ready to store Spring's bounty in a clean and roomy vegetable crisper!

    Cull the Cuddly: Wind Down the Winter Warmers

    Fall brings no greater pleasure than pulling out fleecy sweats, flannel pajamas and warm blankets--but by season's end, these cuddly favorites are frequently worse for wear.

    As warm weather approaches, take a hard look at the family's cold-weather bedding and favorite winter warmers. Separate out the stained sweats, pilled flannel sheets and shrunken loungewear for recycling or donation.

    As you return winter bedding and clothing to closet storage areas, make a quick list of any needed replacements.

    Look alert! End-of-season clearance sales make it easy AND cheap to replace worn-out linens and faded clothes.

    Ready to swing into Spring? Welcome the season from your organized home!

  • Source : organizedhome[dot]com
    post from sitemap

    Clean Sweep? The Case Against Spring Cleaning

    Spring blows in with warm wind and the promise of ... spring cleaning?

    With the coming of spring, even the most casual home managers feel an inexplicable urge to move furniture, clean windows and vacuum baseboards to welcome the return of sunshine and warmer weather.

    But is spring cleaning really necessary?

    Certainly, there's a lot to be said for the notion of spring cleaning. It's a good time of year to rout out the dirt, dust and disorder that's crept into the home since the holiday season. By doing a thorough clean once a year, no area of the home gets too far removed from the results earned by energetic mops, vacuums and cleaning cloths. Longer days bring a new burst of energy for many of us, and using that bonus to deep-clean our homes seems like a good match for rising springtime spirits.

    Then there's another point of view: that spring cleaning is unnecessary in an organized modern home.

    The Case Against Spring Cleaning

    Historic reasons for a traditional spring clean are no longer a factor in the vast majority of today's homes. When homes were heated with wood, coal or coal oil furnaces, the winter heating season brought a build-up of soot and ash on walls, furniture and fabrics. Spring cleaning marked the end of the heating season, when the entire house was aired and scrubbed clean of the dim, smoky film given off by older heat sources.

    But with today's heating technology, this rationale no longer applies. Today's central or forced air furnaces, disposable air filters, and air filtration systems prevent a build-up of soot or film--and knock the props out from under the idea of a top-to-bottom spring clean.

    Modern lives, too, no longer possess the rhythm and pace required to sustain an old-fashioned cleaning marathon. Today's working moms or active mothers of young children don't have the ability to clear two weeks of other commitments to engage in a full-time, full-bore spring cleaning session.

    The notion of turning the house upside down each spring for a thorough cleaning seems as quaint as grandmother's house dresses to today's busy home managers--and it's certain that most of us no longer enjoy grandmother's access to paid household help, either.

    Then there's the inevitable backlash! By the time modern families finish a whole-house deep-clean, we're apt to be so exhausted and alienated from our mops and buckets that we allow cleaning to slide--often for months to a year afterward! Instead of a reasonably clean house all the year long, spring-cleaners sometimes slip into peaks and valleys of clean versus dirty.

    Finally, there are valid maintenance reasons NOT to defer deep cleaning to a single, yearly session.

    Carpeting lasts longest if maintained by frequent vacuuming and regular cleaning, which prevents deposit of abrasive grit deep within the fibers.

    Deferring needed carpet cleaning until spring causes unnecessary wear and works against the goal of a clean house.

    Similarly, windows which are washed on a regular schedule won't develop the scale build-up requiring special treatment in a once-a-year cleaning session.

    Exhaustion. Lack of time. No more seasonal need. The goal of better home maintenance EVERY day. All these factors weigh in against the idea of a good old-fashioned spring cleaning session.

  • Source : organizedhome[dot]com
    post from sitemap

    How to Clean Your Range

    cleaning an oven

    Biggest Challenges
    1. Splatters on the burners and knobs
    2. Charred spills on the oven's bottom
    3. Greasy window in the door

    Fastest Fixes
    1. Clean the cooktop.
    Full disclosure: While you won't be doing backbreaking work, there will be some grime and you'll be working in hot water, so put on rubber gloves to start. For a gas range, remove burner caps, grates, and control knobs, and put them in your sink filled with very hot water and dish soap. As these soak, dip a scrubbing sponge into the sink water, wring, and go over the stovetop, paying extra attention to any stuck-on stains around the burners. Rinse with clean water; let dry. Head to the sink and wipe down each item with your sponge (most of the gunk should glide off now). Rinse and dry the parts; reassemble the cooktop. For a coil electric stovetop, do this soaking method with the drip pans and knobs but not the burners, which shouldn't be submerged (and are self-cleaning). For a smooth electric stovetop, clean the surface with a nonabrasive scrubbing pad and a liquid cooktop cleaner. Finally, dip a sponge in hot soapy water, wring well, and wipe the controls. Rinse and let dry.

    2. Zap oven spills.
    Burned-on blobs welded to the bottom of your oven can give off odors and smoke. If you have time to run a self-cleaning cycle — even a short two-hour one — it's your best bet (and you can go do something else while it works). If not, just focus on the worst stains. Take a metal spatula and gently chip off any loose pieces — with any luck, this alone might do the trick. If not, liberally spritz with full-strength ammonia from a spray bottle. Leave it for at least five minutes, then sprinkle on enough baking soda to completely cover the stain; add just a few drops of white vinegar. Let it bubble for a minute or two, then whisk away the grime with a scrub sponge. Rinse with a clean, wet, regular sponge.

    3. Clear up the glass.
    To soften any baked-on film, spray the inside of the window with the same full-strength ammonia; let it soak. After a few minutes, rub down the glass with a nonabrasive scrubbing pad. Rinse with a wet sponge, and dry with a paper towel or microfiber cloth. Give the glass on the outside of the door a quick spray and wipe as well. That wasn't too bad, was it?

    Make It Easier Next Time

    • Block messes from happening: Cover adjoining burners with extra pot lids when sautéing, and line the rack below drippy pies and casseroles with foil or a cookie sheet (clean the lids or pan in the dishwasher later).
    • If an oven spill happens, immediately and liberally sprinkle it with salt to soak up the mess. When cool, nudge the crusty stain loose with a spatula; wipe clean.
    • Look for tools with the cleaner built-in, like Mr. Clean Magic Eraser with Febreze ($3) for oven windows and Scotch-Brite Cook Top Cleaner ($7) for smooth electric cooktops. Both cleaned GHRI lab ranges easily and without scratching.
    cleaning an oven
    Source : goodhousekeeping[dot]com
    post from sitemap